This article is part of our complete Aluminum Deck Railing guide.
Deck stair railing isn’t just deck railing installed at an angle. The building code requirements are different. The height measurements are taken from a different reference point. The components need angle cuts. Glass panels have to be custom-fabricated to the stair pitch. And installation is significantly more complex than a flat run of railing on a level deck.
If you’re planning a deck project that includes stairs — and most residential decks do — the stair section is where the code questions, the cost surprises, and the installation complexity all live. This guide covers what you need to know before you order.
Why stair railing is different from deck railing
On a flat deck, every post is the same height, every panel is interchangeable, and the railing runs level. On stairs, nothing is level and nothing is interchangeable.
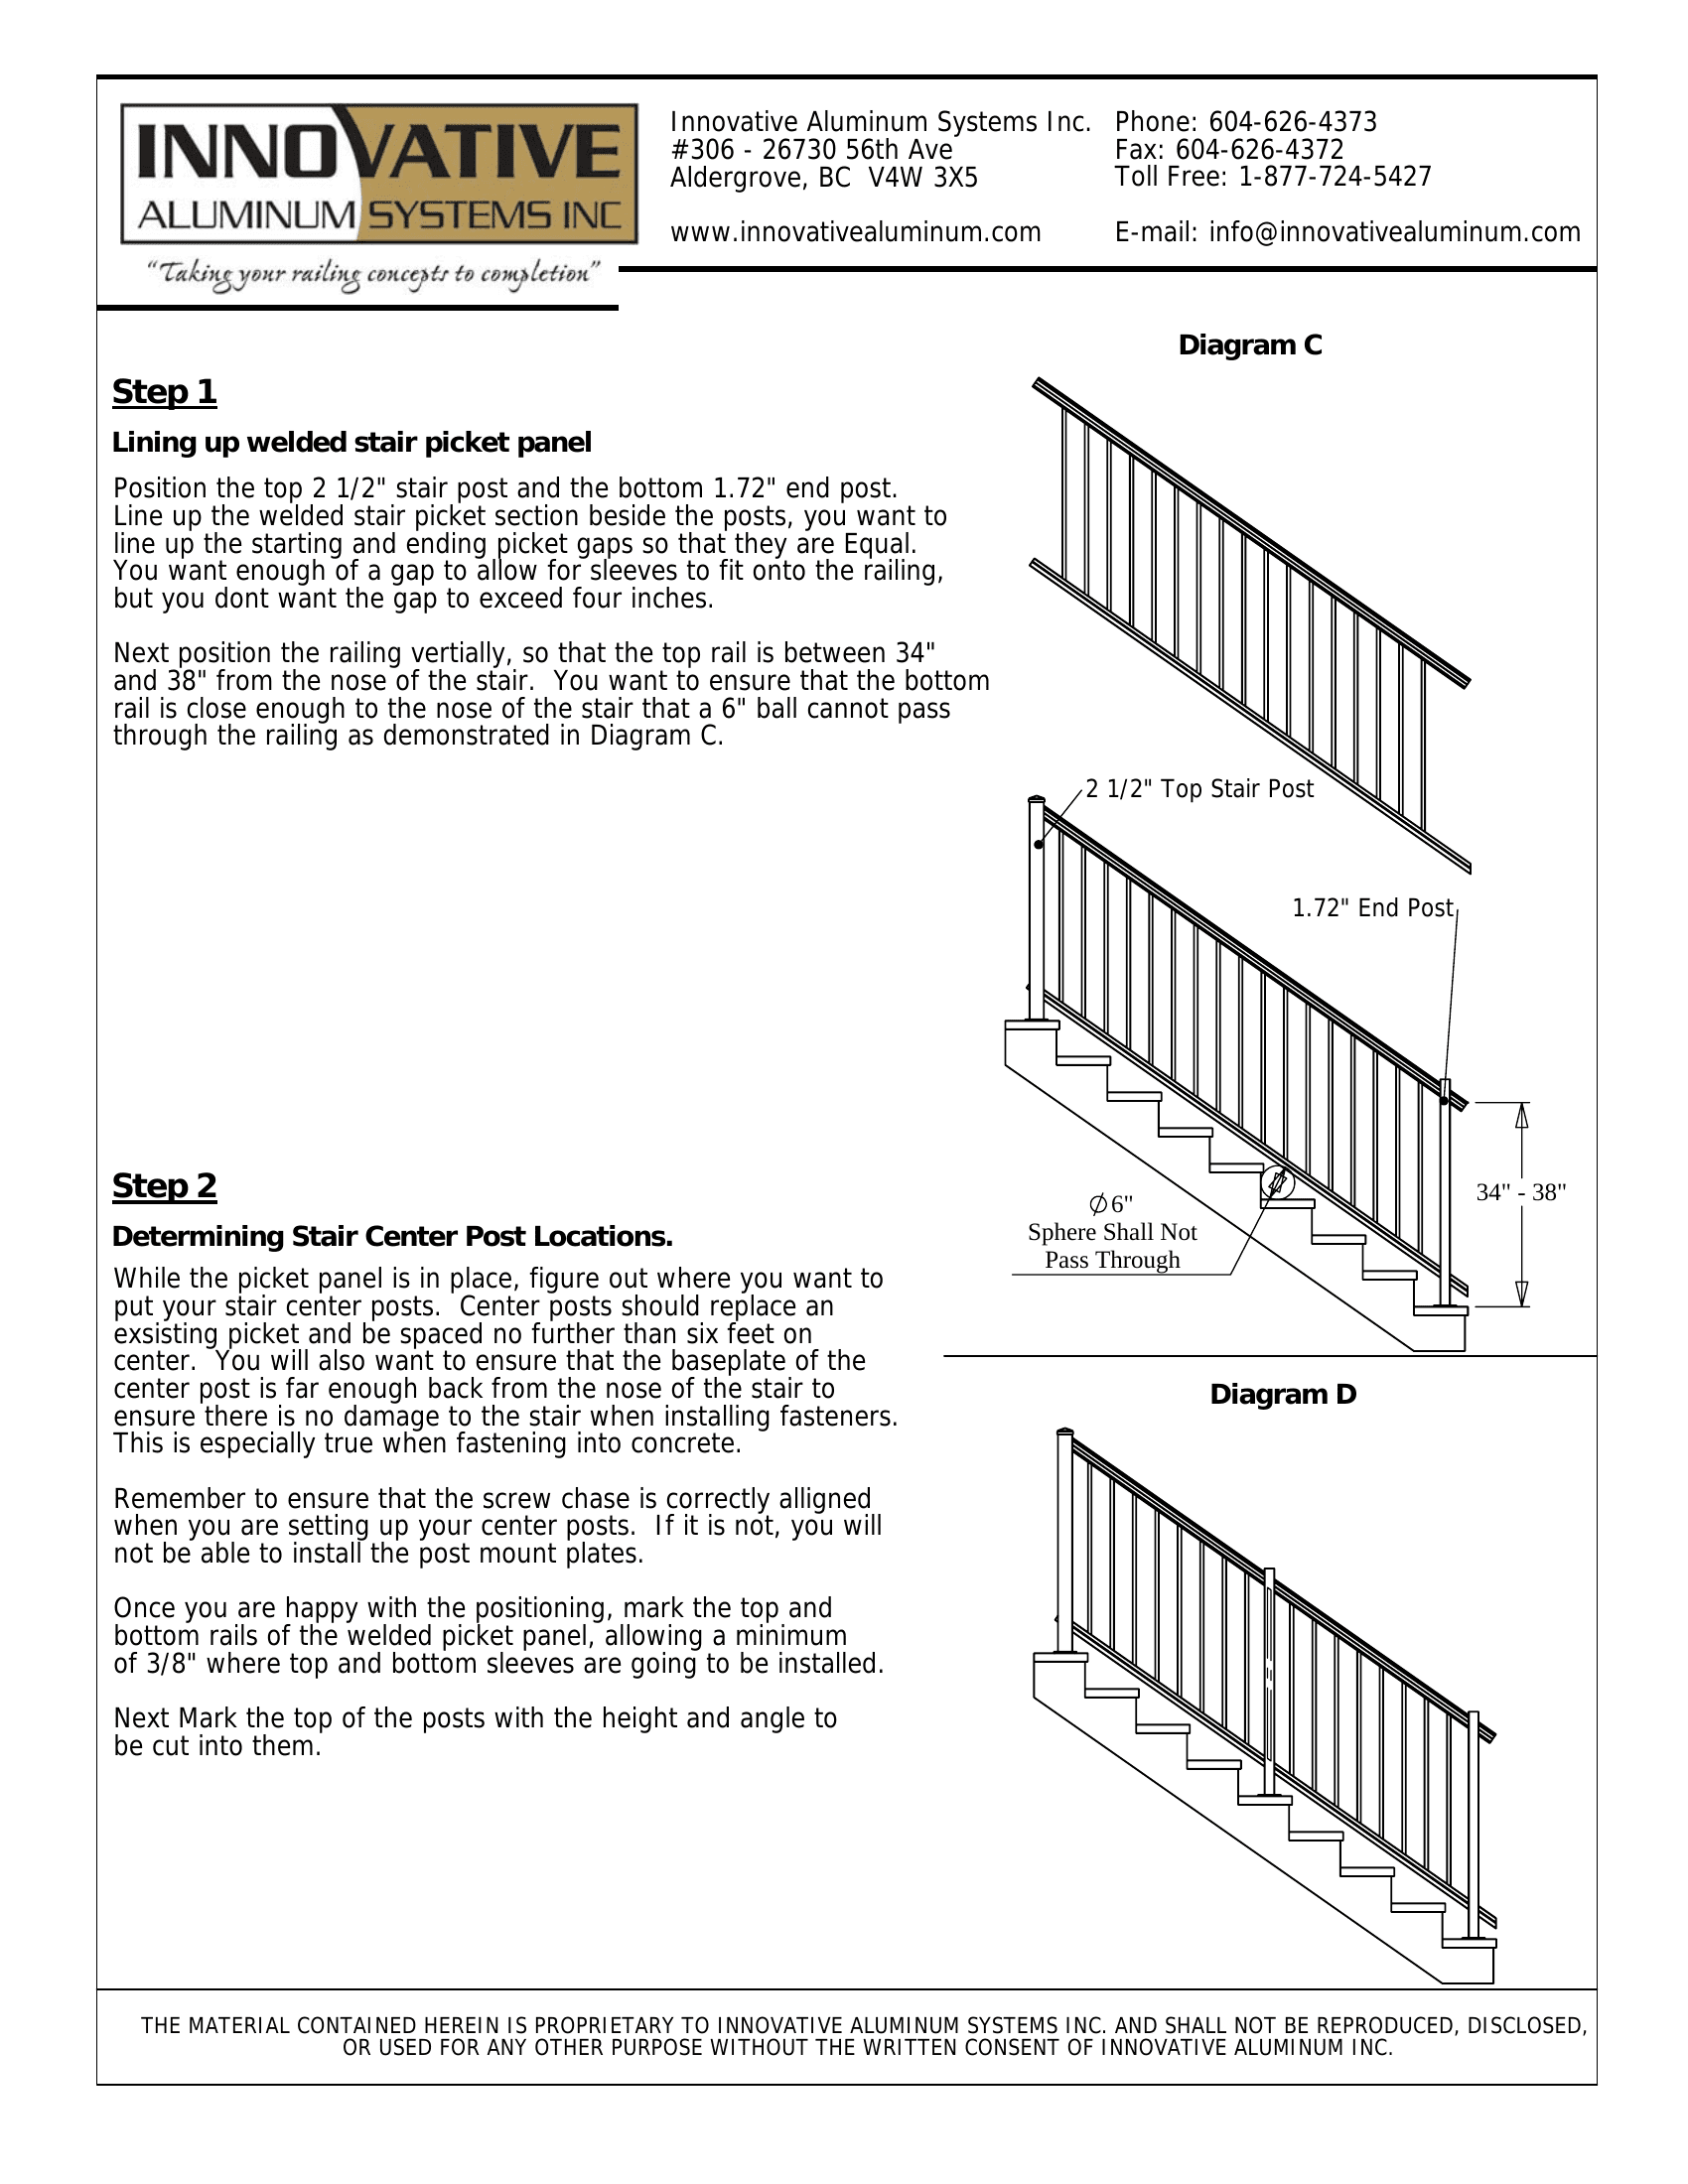
Every post height is calculated individually. Stair railing height is measured from the nose of each stair tread — not from the tread surface. Because the nose-to-nose measurement changes at every post position depending on how far back the post sits from the nosing, each post has to be cut to a specific height based on the stair angle and the setback from the nose. Our stair posts are supplied over-height specifically so they can be angle-cut on site.
Panels are angle-specific. Welded picket stair panels are manufactured at the specific angle of your staircase — available from 1 degree to 45 degrees, in lengths up to 20 feet. Glass panels for stairs are individually cut to match the pitch. You can’t take a flat deck panel and use it on stairs.
Two sphere rules apply simultaneously. The standard 4-inch rule (no opening large enough for a 4″ sphere to pass through) applies to picket spacing. But stairs add a second rule: a 6-inch sphere must not pass between the bottom rail and the nose of the stair. That means the bottom rail position isn’t just structural — it has to be verified against the stair nosing at the specific angle of the stairs.
Deck stair railing code requirements
Stair railing has its own code section, separate from flat deck guards. Here’s what applies:
| Requirement | Flat deck guard | Stair railing |
|---|---|---|
| Minimum height (Canada) | 900 mm – 1,070 mm (36″–42″) | 900 mm (36″) from nosing |
| Minimum height (US IRC) | 36″ | 34″–38″ from nosing |
| Height measured from | Deck surface | Nose of each stair tread |
| Opening rule | 4″ sphere (picket spacing) | 4″ sphere + 6″ sphere at nosing |
| When required | Deck > 24″ (CAN) or 30″ (US) above grade | Stairway with > 2–3 risers |
| Graspability | Not typically required | Handrail must be graspable (check locally) |
The biggest code difference: measurement reference point. Flat deck railing is measured from the deck surface to the top of the rail. Stair railing is measured from the nose of the stair tread to the top of the rail. Because posts sit back from the nosing and the stairs are angled, the post itself is taller than the measured rail height. This is why stair posts are supplied over-height and cut on site.
Graspability is another stair-specific requirement. Many jurisdictions require the stair handrail to be graspable — meaning a person must be able to wrap their hand around it. A flat-top rail profile may not meet this requirement. Round and colonial top rail profiles typically do. Check with your local building authority, because this is one of the most inconsistently enforced requirements across municipalities.
Full code details: Deck Railing Building Code Requirements
Aluminum picket stair railing
Welded picket is the most common and most affordable option for deck stairs. The panel arrives pre-welded at the angle of your staircase — you don’t angle-cut the panel on site, just the posts.

How it works: The top 2.5″ stair post and bottom 1.72″ end post are positioned first. The welded picket stair panel is lined up beside the posts, with the starting and ending picket gaps set equal. The panel is positioned vertically so the top rail sits between 34″ and 38″ from the stair nosing, and the bottom rail passes the 6″ sphere test at the nosing.
Stair center posts are spaced no further than six feet on center. They replace an existing picket in the panel — the picket is removed and the center post takes its place, connecting to the top and bottom rails via mount plates and wall mounts.
What you need to know before ordering: Your stair angle (use an angle finder), the total run length, the number of treads, and the rail height your local code requires. The panel is fabricated to your specific angle — this is not a standard off-the-shelf part. Getting the angle wrong means a re-order.
Glass stair railing
Glass on stairs is the premium option. It looks stunning — the transparency keeps the stairway open and lets light through. But it’s also the most expensive and most installation-intensive stair railing configuration.
Every glass panel is custom. Unlike flat deck sections where panels can be standardized, each stair glass panel has to be cut to the exact pitch angle of the staircase. This means the posts go in first, precise measurements are taken on site, the glass is ordered and fabricated, and then a second installation visit sets the panels. That two-visit process is why glass stair railing costs more than glass on a flat deck.
Glass component works on stairs. Frameless is rare. Our Glass Component system handles stairs well — the aluminum frame provides the structural rigidity needed on an angled installation. Infinity Topless (frameless) is technically possible on stairs but uncommon for exterior deck applications because the post tolerances on an angled surface are extremely tight and the cost premium is significant.
The glass doesn’t block the stairway visually. On narrow deck stairs, picket railing can make the stairway feel enclosed. Glass opens it up. If your deck transitions from a glass railing on the flat section to picket on the stairs, the visual disconnect can be jarring — glass on both creates a seamless look from deck to ground.
Stair railing design ideas
The stair section is often the most visible part of the railing system — it’s the first thing you see when approaching the deck from ground level. A few configurations that work well:
Glass on the view side, picket on the house side. If your stairs face outward toward a view, glass on the outward-facing run preserves the sightline while picket on the house-side run keeps cost down. Same colour posts, same top rail profile — the infill is the only difference.
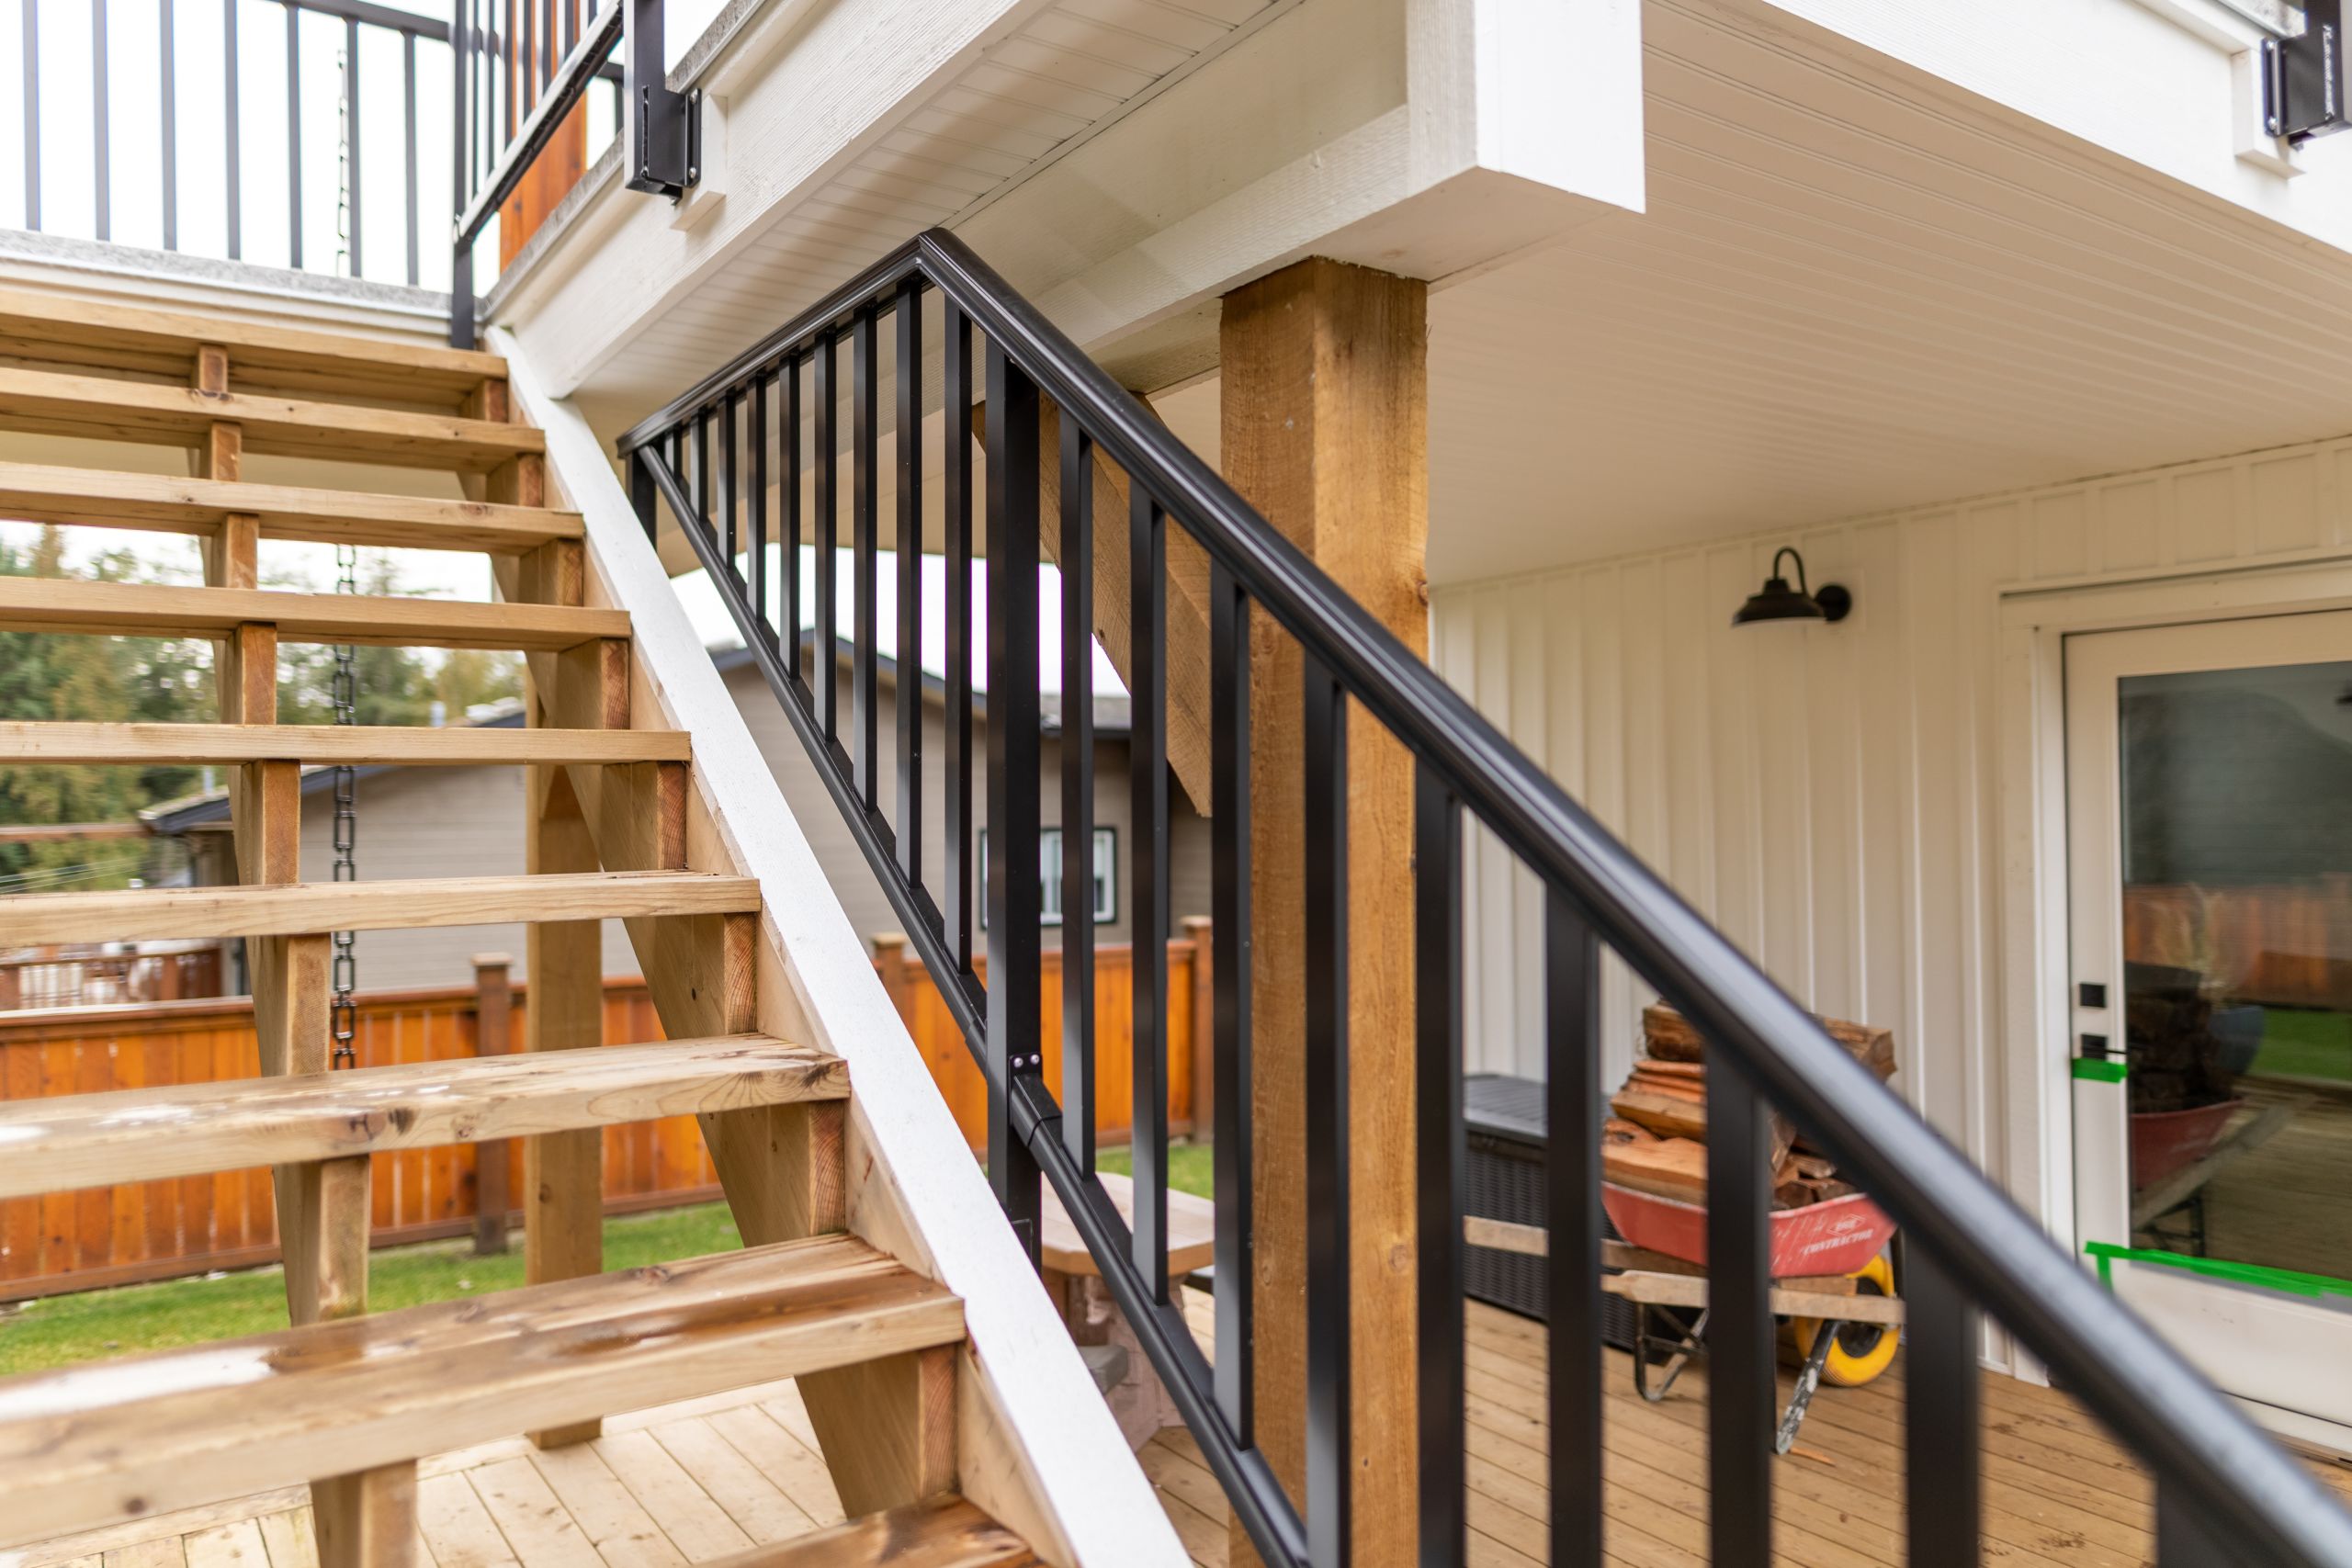
Black aluminum on composite or dark wood. Black powder coated stair railing on dark grey composite treads is the most popular modern combination our dealers install. The slim aluminum profile reads as contemporary without competing with the deck material.
Matching the deck-to-stair transition. The cleanest installations use the same system and colour from the flat deck through the stair section. The transition post — where the flat rail meets the angled stair rail — is the focal point. A properly configured transition with a 2.5″ post and the right sleeve creates a seamless line from deck height down to grade.
Contrasting top rail profiles. Square top rails read modern. Round profiles are more traditional and typically meet graspability requirements for stair handrails. Colonial profiles work on heritage and craftsman-style homes. The top rail profile on the stair section may need to be different from the deck section if your local code requires a graspable handrail on stairs.
More design inspiration: Aluminum Deck Railing Design Ideas
Why stair railing costs more
Stair sections cost 15–30% more per linear foot than flat deck sections of the same system. Here’s where the extra cost comes from:
Custom components. Welded picket stair panels are fabricated to your specific stair angle — they’re not stock items. Glass panels are individually cut. Stair posts are supplied over-height and cut on site, which means more material per post.
More complex installation. Every post needs an angle cut at the top. The screw chase alignment is harder to verify on an angled surface. The 6″ sphere test has to be checked at the nosing. Center posts need to be precisely positioned. All of this takes more labour time than a flat run.
Two-visit glass installation. For glass stairs, the posts go in first, measurements are taken, glass is ordered, and a second trip installs the panels. That’s two mobilizations instead of one.
The transition post. Where the flat deck railing meets the stair railing, a transition post and specific sleeves are required. This is an additional component that doesn’t exist on a straight flat run.
Detailed cost breakdown: How Much Does Aluminum Deck Railing Cost?
Installing stair railing
We covered the full installation process — including stair-specific steps — in our Aluminum Deck Railing Installation Guide. Here’s the summary for stairs specifically:
Measure your stair angle first. Use an angle finder. This determines the panel angle (for picket) and the post cut angles. Getting this wrong cascades into every other step.
Position the top and bottom posts. The top 2.5″ stair post and bottom 1.72″ end post set the frame. Line up the panel beside the posts with equal picket gaps at both ends. Verify the top rail is at the correct code height from the nosing and the bottom rail passes the 6″ sphere test.
Cut posts to height using the trim dimension. Each post height depends on the stair angle and the setback from the nosing. Our Flex-Rail installation guide includes a trim dimension table for angles from 1° to 47° — the formula is: overall post height = 36″ minus the trim dimension plus the nose-to-nose dimension at that post location.
Professional installation is strongly recommended for stair sections — even if you DIY the flat deck railing. The angle cuts, the height calculations, and the two-sphere compliance check are demanding enough that a mistake costs real money. Our dealer network can connect you with experienced installers.
Planning a deck with stairs?
Stair sections are where layout accuracy matters most. Our Online Railing Designer handles stair runs, transitions, and angle calculations automatically — so the parts list matches your actual staircase. Contact us for free access and a consultation.
Frequently asked questions
What is the code for deck stair railing height?
In the US (IRC), stair handrails must be between 34 and 38 inches, measured from the stair nosing to the top of the rail. In Canada, the minimum is 900 mm (about 36 inches) from the nosing. The measurement is from the nose of each tread — not from the tread surface. Some municipalities require higher, so confirm with your local building department.
Do I need a railing on deck stairs?
In most jurisdictions, yes. Any stairway with more than two or three risers requires a handrail on at least one side. If the stairway is open on both sides, most codes require a guard on both sides. This applies to exterior deck stairs the same way it applies to interior stairs.
Can you put glass railing on deck stairs?
Yes. Glass component railing works well on stairs — the panels are custom-cut to the stair angle. It costs more than flat deck glass because each panel is fabricated to a specific pitch, and installation requires two visits (posts first, measurements taken, glass ordered, then glass installed). Frameless glass on stairs is rare for exterior decks due to the tight tolerances on an angled surface.
Why does stair railing cost more than deck railing?
Every component on stairs has to account for the angle. Panels are custom-fabricated to the stair pitch. Posts are supplied over-height and angle-cut on site. Glass panels are individually cut. Installation takes longer because alignment on an angled surface is more demanding. Expect 15–30% more per linear foot for stair sections compared to flat deck sections of the same system.
What is the 6-inch sphere rule for stair railing?
The bottom rail must be close enough to the stair nosings that a 6-inch sphere can’t pass through the gap. This is a child safety requirement separate from the 4-inch sphere rule for picket spacing. Both rules apply simultaneously on stair railing. Verify this during installation by holding a 6″ ball at the gap between the bottom rail and the nosing at the widest point.